In my role at AvePoint, I am often demonstrating the various applications in AvePoint Online Services (AOS), AvePoint’s Saas version of their solutions for managing Microsoft 365 environments. This post will be a deep dive into one of the more obscure, but fundamentally important, objects in AOS: a Storage Policy.
Put plainly, several functions in AOS require a place to put things. In this case, i wanted to create an archive policy to automatically move content that hadn’t been accessed in a defined period of time, moving that content to a non-365 archive and removing it from SharePoint Online. That “place” is called a Storage Policy.
Like its non-Saas sibling DocAve, Cloud Management builds a Storage Policy out of two fundamental object layers: one ore more Physical Devices, which are then bundled together as a Logical Device. A “Physical” device can actually be a cloud-hosted virtual device, such as Azure storage, AWS storage, Box, or other cloud storage services. All devices in a Logical Device must be of the same type, i.e. all Azure, all AWS, etc.
Since I have an Azure storage account already, I went with Azure.
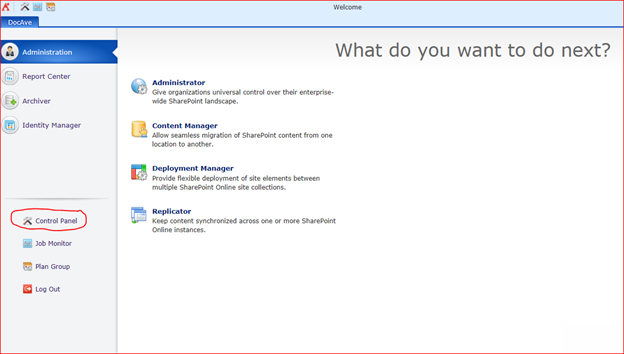
I logged in to AvePoint Online Services and accessed Cloud Management. First stop, the Control Panel.
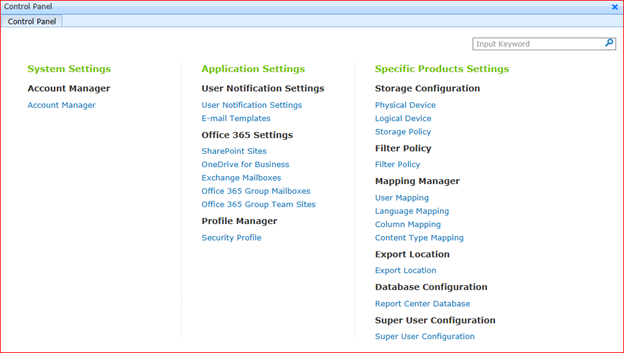
Clicking on Physical Device, I get to the Physical Device list, then Create.
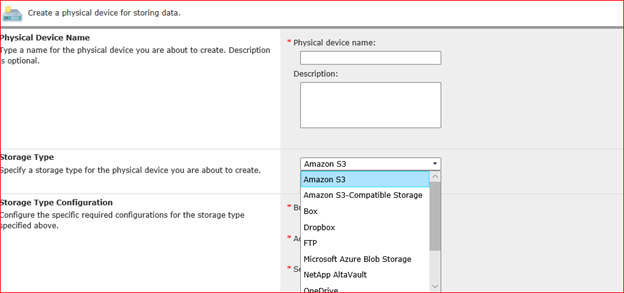
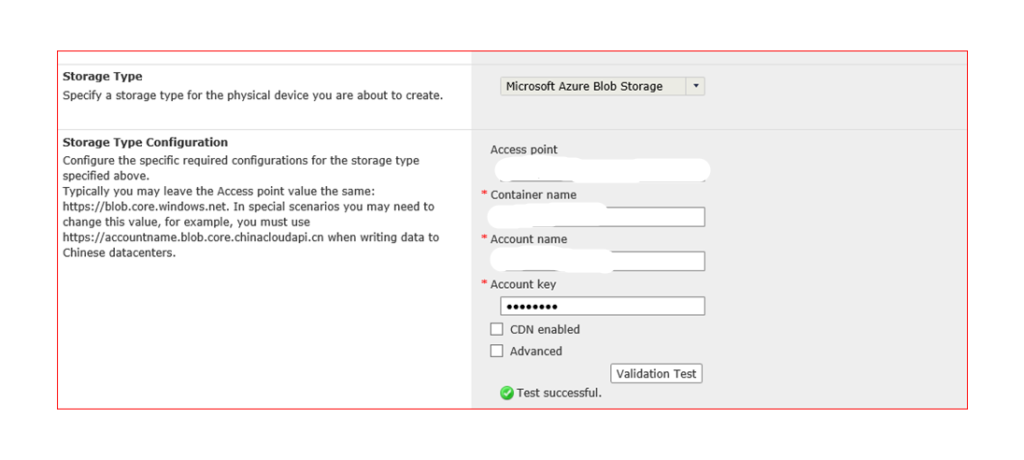
To configure Cloud Management to use my Blob, I needed to provide the following:
- Access Point – the URL in the Blob Container properties, less the container name. If you squint, you’ll see that in the Physical Device dialog, https://blob.core.windows.net is typically sufficient, unless you’re doing something special with your AzureBlobs. Put another way: if https://containername.blob.core.windows.net/containername is the full URL, then the Access Point is that without /container name. For the container name,use containername, without the / .
- Container Name – as mentioned above, this is the /value in your Access Point URL.
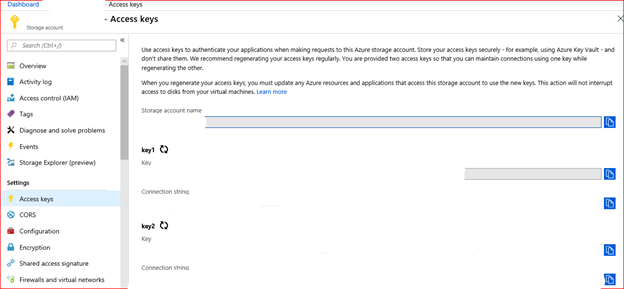
- Account Name – this and the Account Key are found at the storage account level, not the Blob level: Dashboard –> Storage Account –> Access Keys. In my case, the Account Name was the same as the Container name.
- Account Key – See # 3.
Cloud Management provides a handy little Validation Test button, so you can check it’s all correct before running off to rely on something you’re not quite sure works.
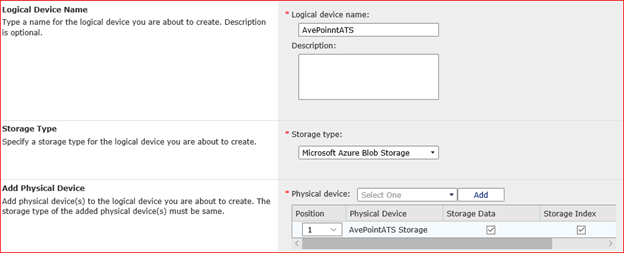
With my Physical Device configured, the rest is a breeze.To configure a Logical Device, I create a new Logical Device and point it at my Physical Device. Note: a Logical Device can consist of multiple Physical Devices, as long as each Physical Device is the same platform. You could pool multiple Azure Storage Pools into one Logical Device.
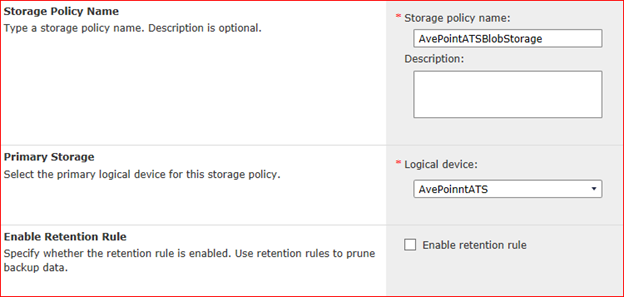
, Then, I created my Storage Policy, pointing it at the Logical Device I’ve just created.
By the way, AvePoint’s YouTube Channel has plenty of short how-to videos, including the on-premise version of creating a Physical Device. Additionally, there’s a how-to video on how to create a Logical Device in Cloud Management.