At Ignite 2018, Microsoft announced some major changes to how labels work in Office 365, as well as integration of some Azure Information Protection functionality into Enterprise 365 licenses (E3, E5). I’m not going to recap how these features and functions previously worked, but will go over how they work now, using examples from a developer tenant.
Two Kinds of Labels
One of Microsoft’s apparent goals was to unify two previously separate services. Office 365 labels were originally developed as “retention labels”, used to define how long content would be kept in Office 365. Azure Information Protection labels were part of an Azure service to put access controls on content.
In the broader world of “why do we label documents”, these stories can be summarized as, “how long do I need to keep this,” and, “under what circumstances should this be accessible?”
Put another way, let’s go with retention and sensitivity. Retention is usually governed by regulation, such as “financial records must be retained for at least seven years”. Sensitivity has more to do with security, – where can content be accessed, and by whom. These requirements are typically defined by different teams in a business setting, and a coherent labeling strategy requires input from both.
An easy example might be contracts. A contract of any kind might be required to be held for three years. However, are all contracts the same level of sensitivity? A contract to provide water jugs to the office might be pretty innocuous; a contract to provide derivatives to specific customers, perhaps with their Tax ID numbers, might be more sensitive.
Retention Labels in Office 365
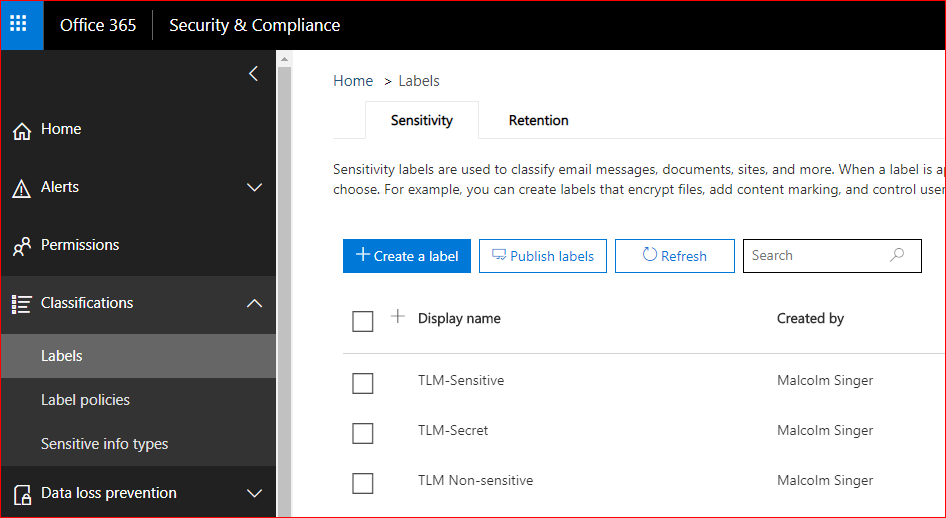
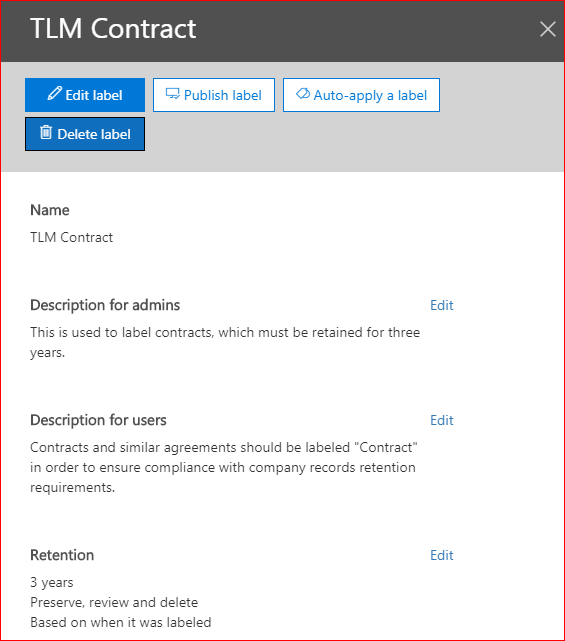
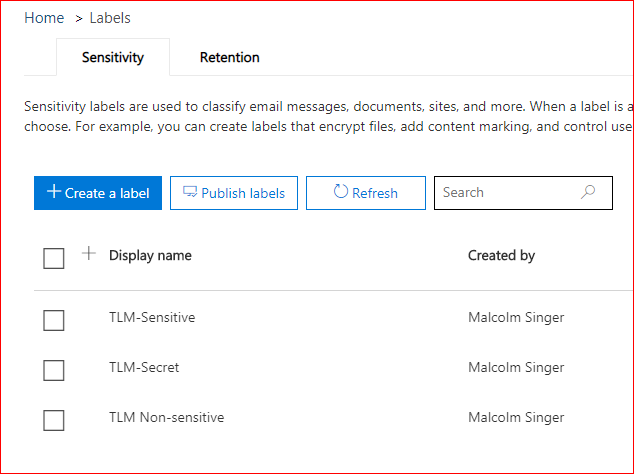
Here’s how Microsoft is handing labels in Office 365 now. My example environment has E3 licenses assigned to all active users. Malcolm Singer is an IT admin who needs to create some new Retention and Sensitivity labels, so he goes to the Security & Compliance admin center, Classifications, and decides to start with Retention labels.
When Malcolm creates a new label, he’s going to give it a name that users will see, some notes for future administrators, and a description for users who aren’t sure what the label means.
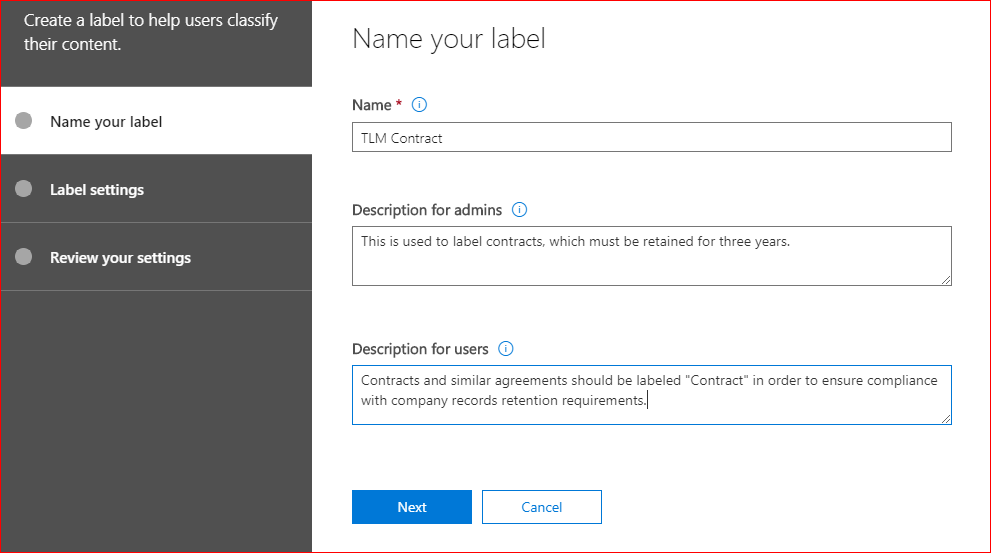
While it’s possible to create a retention label with no settings – essentially, a digital sticky-note – the whole point of retention labels is to define a retention period, and to define what happens after that period ends.
In this example, contracts must be kept for three years, and after that Cindy in finance is responsible for reviewing them. The clock starts as soon as the content is labeled.
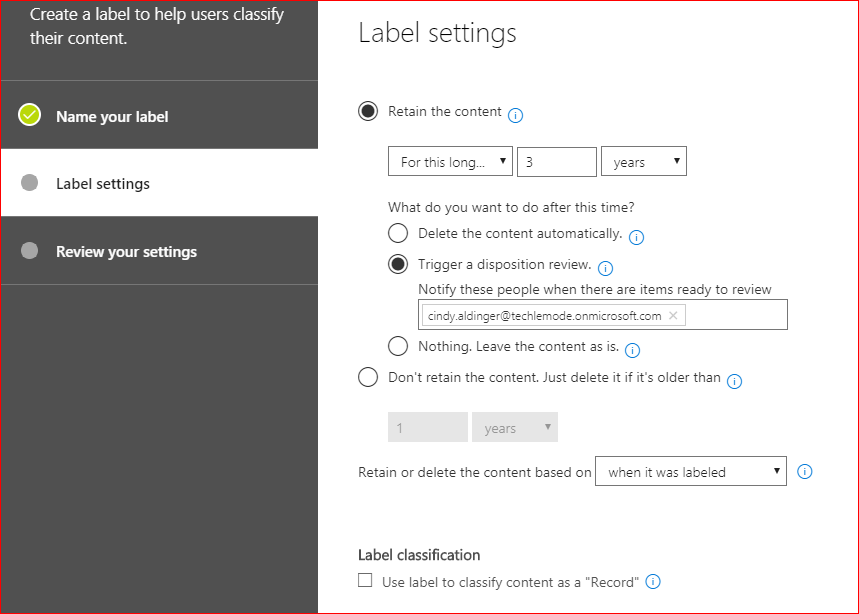
Retention labels include the option to declare a document as a SharePoint Record, which means that it cannot be deleted or edited. However, the metadata about a Record can be edited. In this example, Malcolm isn’t setting the label to declare content as a record.
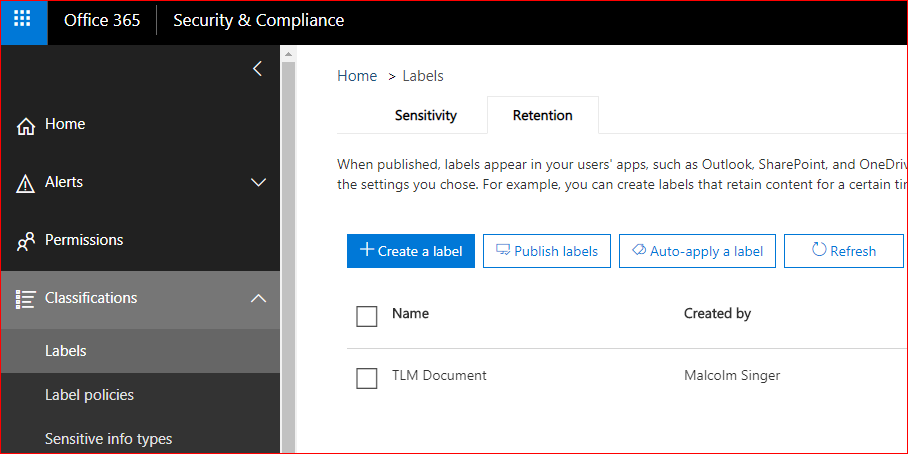
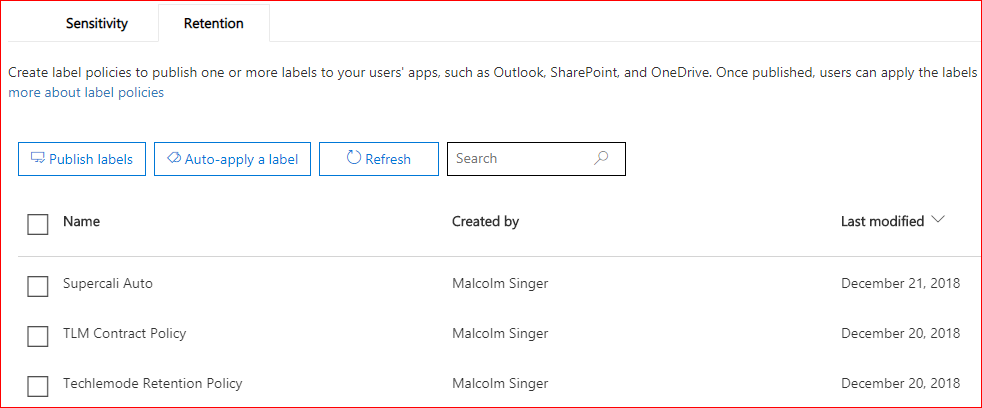
Once the label is created, it still needs to be published in order to be available. Labels are published to a Label Policy, and individual labels may be published to multiple Label Policies.
When a retention label is published to a Label Policy, it can be made available to all supported 365 services (Exchange, Groups, OneDrive, and SharePoint), or limited to specific services. By selecting the latter option, a Label Policy can also be limited to specific users or groups of users. This is a pretty common use case: “Department X has very fine-tuned labeling requirements that don’t apply to anyone else”.
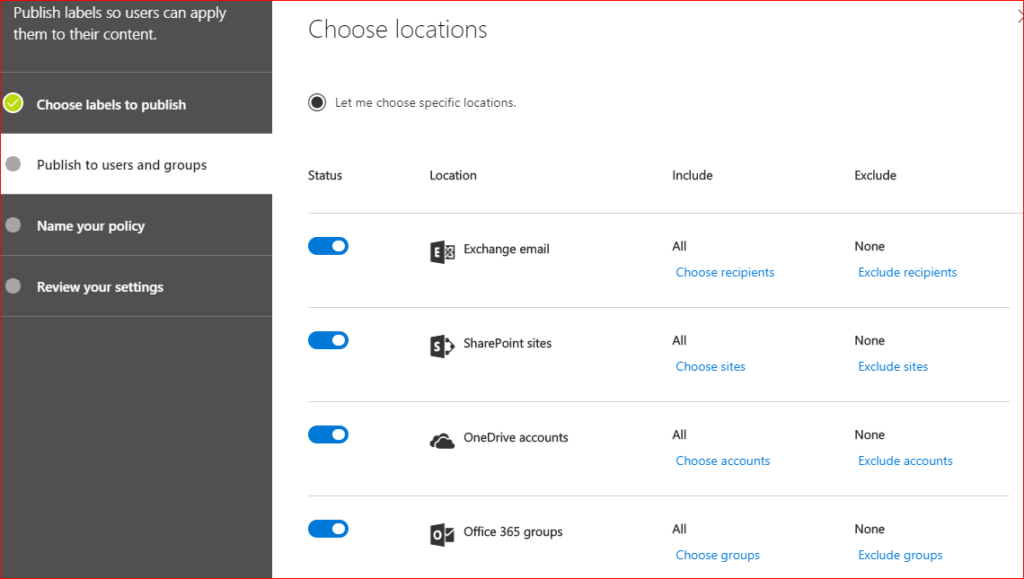
In this case, the Label Policy will be available to everyone in all services.
Let’s step back from the interface and think through why we might want to do that.
The Finance department might have a sophisticated set of labels to use in identifying their retention policies. They might have labels for Contracts, for Receivables, Payables, Disputes, Credit Memos, and so on.
Let’s say that Malcolm has already created a dozen labels for Finance and rolled them into a “Finance Retention Policy”.
The next month, the Facilities team comes to Malcolm and says they want to make sure they don’t throw away any contracts, and after talking to them, Malcolm realizes that the definition of “Contract” used for Finance is good enough for Facilities, but they don’t need the rest. So, Malcolm creates a new “Facilities Retention Policy” that only has the one label, for Contracts. Both of these policies are limited in scope to Finance and Facilities, respectively.
Sensitivity Labels in 365
Sensitivity labels are a little more complex. This is where some functionality that was previously exclusive to Azure Information Protection (AIP for short) is getting rolled into 365 Enterprise licenses.
Note: this isn’t AIP being included with Office 365. This is adding functionality to Enterprise Office 365 licenses, functionality that was previously part of AIP alone in the past.
Sensitivity labels have a different purpose than Retention labels, with tabs for configuring encryption, marking, and loss prevention. Whereas Retention was about how long to keep content, Sensitivity is about controlling how that content is handled.
The Encryption section can be a bit misleading, because the settings that can be configured are very granular, and not specific to an encryption method. If you’re familiar with the old Information Rights Management (IRM), you’ll feel right at home.
First of all, you can choose whether to apply the rule to both email and files, or just to files. You can time-bomb access to data, or require that the user be online in order to access it. You can also time-bomb access to files offline – no more stuffing the hard drive and walking off the job with perpetual access to those files.

In addition to all that, you can grant specific permissions to specific users or groups in your environment, or by email address or domain, either defining them by role (co-owner, co-author, reviewer, or viewer), or by customizing from the list of settings shown below.
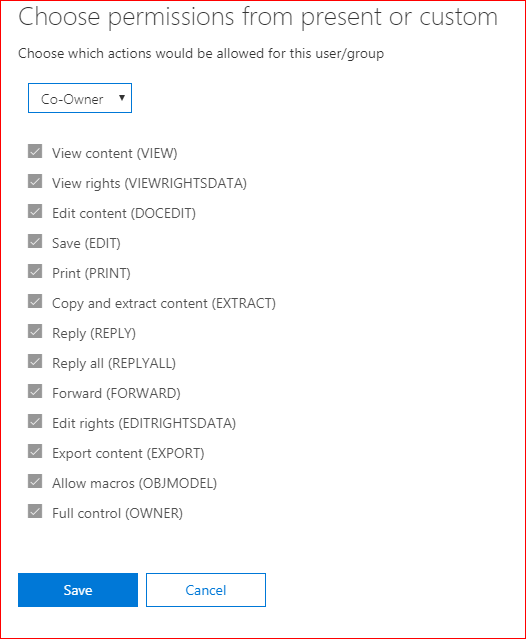
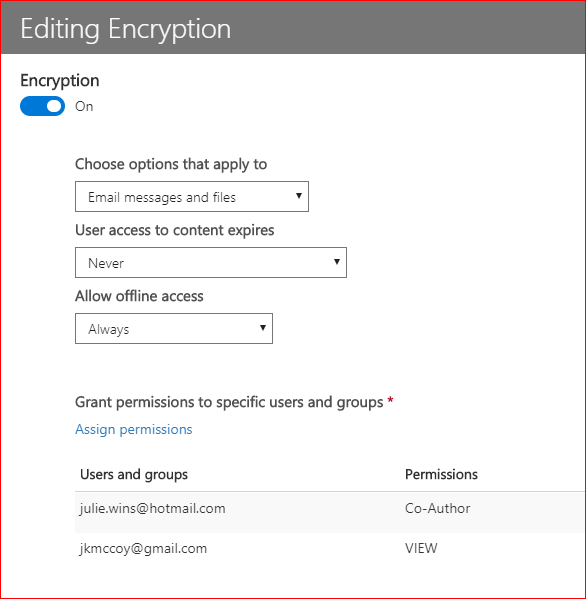
In the above image, I’ve applied the same scope and availability rules to both julie.wins and jkmccoy, but julie.wins has a co-author role for content labeled TLM Secret, while jkmccoy can only view content that is labeled TLM Secret.
Content marking is pretty straightforward, placing-marks-in-document: enter text in the header, footer, or full-page watermark. For now, all these marks are text-only – no defined images.

Lastly, with Sensitivity labels, you can enable endpoint data loss prevention, which is a topic of its own that I won’t get into in this post. Essentially by throwing this switch, you are enabling Windows Information Protection to protect the document.
Automatic Labeling
So far, we’re either blindly auto-labeling content, or relying on users to label content. The first is ham-fisted at best, and the second relies on users knowing when and how to label content, as well as having the patience. What about automatic labeling?
Retention labels and Sensitivity labels can both be set to be automatically applied, but under different circumstances, and dependent in part on what Office 365 and AIP licenses you have available. In this environment, Malcolm can create a Retention label policy that is automatically applied.
To keep things simple, this policy is based on the presence of the word, “supercalifragilisticexpialidocious”. First, here’s the label.
All Malcolm’s done is add the one keyword (he could add many, many more) along with a retention policy. In this case he’ll only keep these documents for fourteen days after they are labeled, at which point Malcolm gets notified to review.
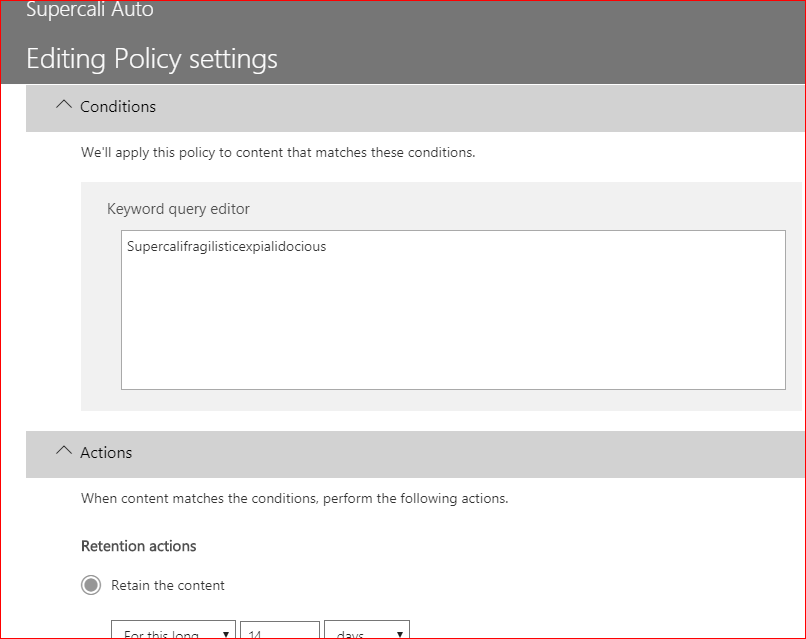
Clearly, this is a silly example – it’s just to show that you can automatically apply retention policies based on a keyword.
However, what if one or more keywords are insufficient, or too complex? What if you were required to retain content based on a regulatory requirement, such as Graham-Leach-Bliley or HIPAA, or their non-US counterparts? Microsoft’s got you covered there, as well.
By using new or default Sensitive Info Types, a Retention policy can be automatically applied based on the contents of a document. These templates include multiple criteria to meet specific requirements.
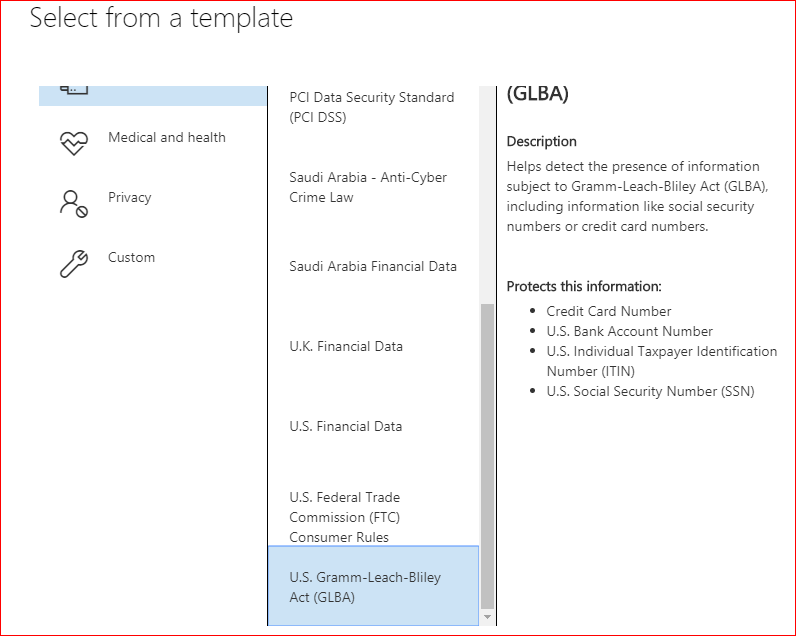
It’s important to note that these are templates. No customer I’ve worked with is covered 100% by the templates that are available out-of-the-box from Microsoft or any other vendor. If you’ve come this far down the configuration hole, you’re going to be taking one or more of these templates and customizing them – yet another topic that deserves its own blog post.
Automatic labeling using Sensitivity labels is a bit different. The good news is that Microsoft brought down a lot of functionality from MIP into 365 E3 and E5 licenses. The not-so-good news is that some functionality requires E5 licenses, or additional MIP licenses.
Within this E3 environment, all Malcolm can do to automatically apply Sensitivity labels is create a policy that applies a license by default, like so:
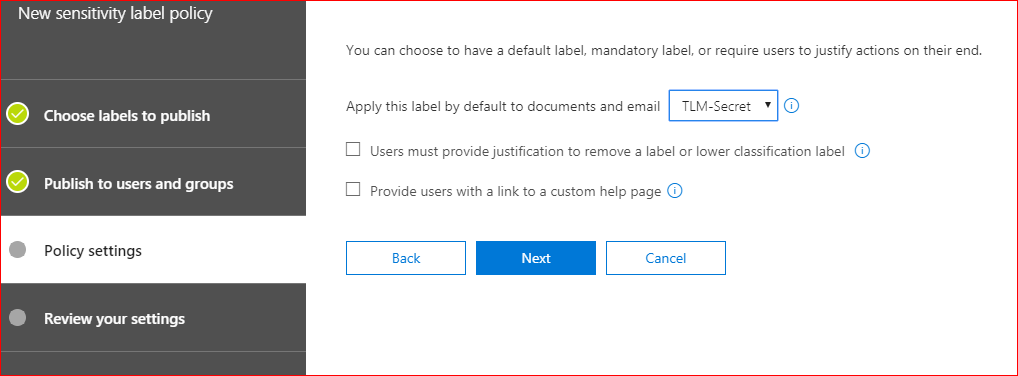
He can also require users to enter justification if they need to change the label from the default, and give them a URL to a help page; essentially http:///company.com/data-classification.policy.aspx .
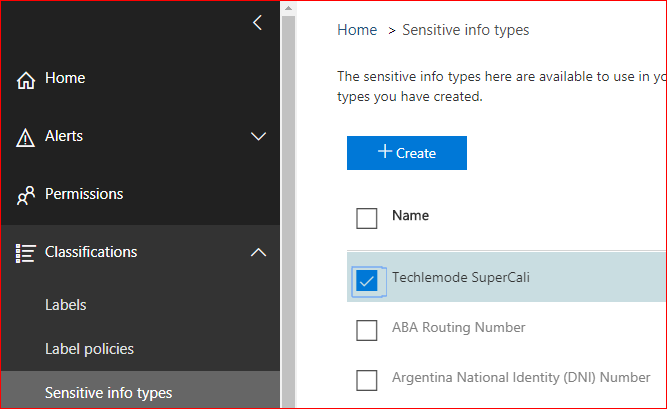
Lastly, here isa visual tour of where Sensitive Info types get configured. This is where Malcolm defined Supercalifragilisticexpialidocious as a keyword type of sensitive info.
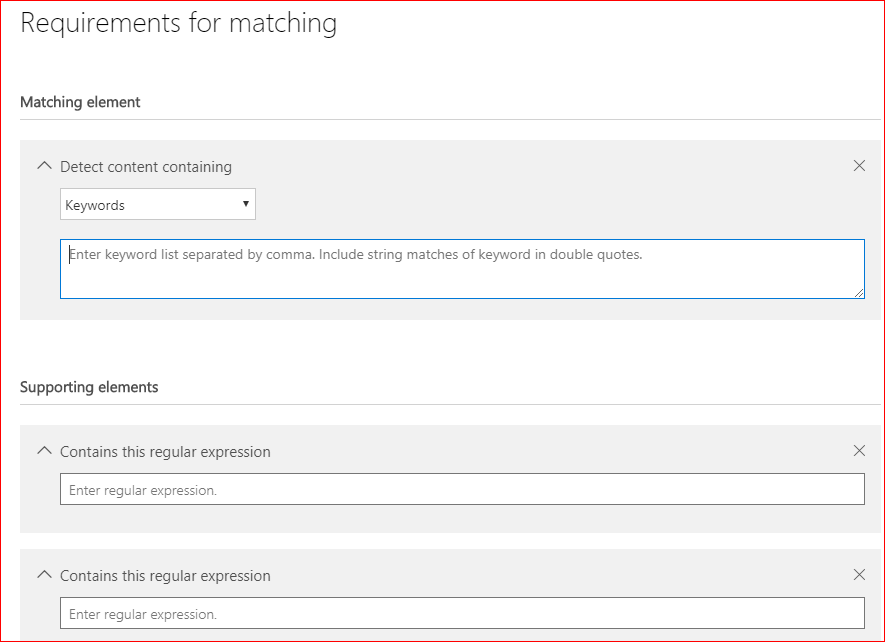
However, more practically, Malcolm might create a sensitive info type that is based on the presence of one or more types of sensitive information, based on a keyword, regular expression, or dictionary (the latter being basically a very large list of keywords).
Matching elements and Supporting elements can each be keywords, dictionaries, or regular expressions. The distinction between a Matching element and Supporting elements is that the Matching element must be found, and Supporting elements refine the rule. “Look for this, but also that and the other”.
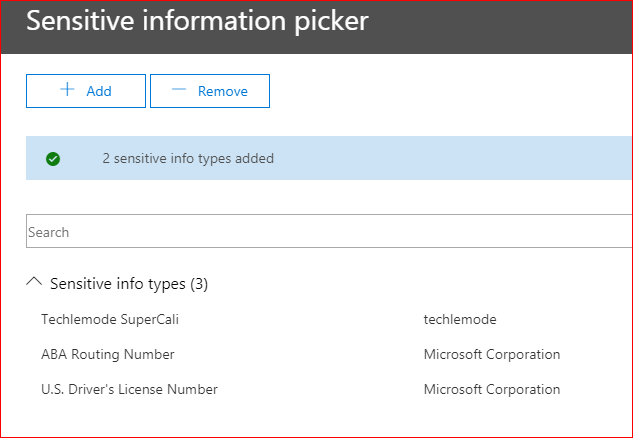
The sensitive info types that Microsoft includes with Office 365 cannot be edited, as they are referenced by some of the templates mentioned earlier. However, you can add your own custom sensitive info types, and then reference both those as well as the out-of-the-box types to create your own settings for automatically labeling content, like so:
One last word about auto-tagging based on the content of a document in Office 365: Office 365 relies on the search crawl to read that content; that is, Office 365’s automagical way of indexing content, mostly for the purpose of end-user search. There are two challenges in relying on this.
First, the index crawler takes time; in a large organization, it can take days to index content. Second, there are ways of hiding content from index. This isn’t to say relying on the search index is bad, because it’s actually quite remarkable in how well it does work. It just means that you should understand the limits and be ready to explain them to your user community.
To summarize all of the above, Microsoft has taken two similar yet different functions, independently developed, and moved them into the same toolbox. The result is that Office 365 administrators can provide their users with a robust classification system that not only tells them about the content that is labeled, but which also enforces the longevity, disposition, and access to that content.
What I’ve seen time and time again with customers is that in order to implement labels well, at least three separate teams are involved, often defined as IT, Security, and Records. IT typically owns Office 365, or “collaboration” or “modern workplace”.
Security has broad remit over access to the environment and the data that resides there; Records is a relatively new role that understands the internal and external regulatory requirements for retaining and disposing of data. Security doesn’t care about how long data should be retained, and Records is not concerned with access except, perhaps, for purposes of legal eDiscovery.
IT doesn’t know the details driving either, but is in charge of making it happen. Therefore, successful implementation of labels requires all three groups working together.
4 thoughts on “Office 365 Labels”